2D 비례 항법 미사일 시뮬레이션
제작 동기
“백문이 불여일견(百聞不如一見)” 이라는 말처럼, 저는 글보다 그래프나 시뮬레이션 같은 시각 자료로 공부할 때 더 쉽게 이해하는 편입니다.
최근 가짜연구소에서 Convex Optimization을 공부하다가, 책에 나온 수식이 실제로 어떻게 작동하는지 직접 확인해보고 싶어 시뮬레이션을 제작하게 되었습니다.
시뮬레이션 결과
1. 시뮬레이션 동적 시스템 모델링
시뮬레이션의 2차원 평면 운동을 상태 공간 모델로 표현해 봅시다.
미사일의 상태 벡터 $\mathbf{x}(t)$를 위치와 속도로 정의합니다.
제어 입력 $\mathbf{u}(t)$는 미사일이 생성하는 추력 가속도 벡터입니다.
\[\mathbf{u}(t) = \begin{bmatrix} a_{thrust, x}(t) \\ a_{thrust, y}(t) \end{bmatrix}\]이를 기반으로 시스템 동역학은 다음과 같은 비선형 상미분방정식(ODE)으로 표현됩니다.
\[\dot{\mathbf{x}}(t) = f(\mathbf{x}(t), \mathbf{u}(t)) = \begin{bmatrix} v_x(t)^T \ v_y(t)^T \ \frac{u_x(t) + F_{drag, x}(\mathbf{v})}{m}^T \ \frac{u_y(t) + F_{drag, y}(\mathbf{v})}{m}^T \end{bmatrix}\]여기서 항력($F_{drag}$)은 속도 벡터 $\mathbf{v}$에 대한 비선형 함수 $-C_d \lVert \mathbf{v} \rVert \mathbf{v}$로, Nonlinear 합니다.
저는 항력을 상수로 두고 계산하였는데, 나중에 찾아보니까 이것도 변수로 설정해야 되더라구요.
왜 Nonlinear인가?
Linear와 Nonlinear를 구분하는 쉬운 방법은 ‘입출력 관계’를 살펴보면 됩니다.
-
Linear
입력을 2배로 하면 출력도 2배가 됩니다. 그래프로 보면, 완벽한 직선입니다.
e.g., $y=2x$라는 관계는 Linear합니다. -
Nonlinear
입력을 2배로 하여도 출력이 2개가 되지 않습니다. 그래프가 곡선 형태입니다.
이제 항력 공식을 살펴보겠습니다.
\[F_{drag}=-C_d \lVert \mathbf{v} \rVert \mathbf{v}\]여기서 눈여겨 볼 점은 속도($\mathbf{v}$)가 두 번 곱해진다는 점입니다. 곡선이라는 것이죠.
Nonlinear를 해결하기 위하여, 오일러 방식으로 이산화하였습니다.
2. 고전적 휴리스틱: 비례 항법 유도(PN, Proportional Navigation)
이 시뮬레이션에서 $\mathbf{x}(t)$에 의존하여 제어 입력 $\mathbf{u}(t)$를 결정하는 피드백 제어(Feedback Control)입니다.
최적 제어 관점에서의 한계
- Sub-optimality: PN은 요격을 보장하나, 연료 소모나 비행 시간 측면에서 최적이 아닐 가능성이 높습니다. 전체 비행 경로에 대한 고려 없이 현재의 오차에만 반응하기 때문입니다.
- Constraint Handling: 제어 입력 크기($\lVert \mathbf{u}(t) \rVert \leq u_{max}$) 나 상태 제약(e.g., 특정 경로 회피) 등을 명시적으로 다루기 어렵습니다.
3. 최적 제어(Optimal Control) 문제로 재정의
이 유도 문제를 최적 제어 문제로 공식화해봅시다. 우리의 목표는 최소한의 제어 노력(연료 소모와 비례)으로 미사일을 목표물에 명중시키는 것입니다.
목적 함수 (Objective Function)
\[\text{minimize} \ J=\int^{T}_{0} ||\mathbf{u}(t)||^2 dt\]제약 조건 (Constraints)
- 시스템 동역학: $\dot{\mathbf{x}}=f(\mathbf{x}(t), \mathbf{u}(t))$
- 초기 조건: $\mathbf{x}(0) = \mathbf{x}_{initial}$
- 제어 입력 한계: $\lVert \mathbf{u}(t) \rVert \leq u_{max} \ \text{(연료가 있을 때)}$
- 종단 조건 (Terminal Constraint): $\mathbf{p}_{missile}(T) = \mathbf{p}_{target}(T)$
최종 시간 $T$가 정해지지 않은 Nonlinear 최적 문제입니다. 동역학과 제약 조건의 비선형성으로 인해 이 문제는 Non-convex 문제입니다.
4. Convex Optimization 가능성: Successive Convexification
Non-convex 최적화 문제를 직접 푸는 것은 어렵습니다. 하지만 이 문제를 연속적인 Convex-Subproblem로 근사하여 푸는 접근법이 있습니다.
바로 Successive Convexification (SCP) 또는 Sequential Convex Programming 입니다.
SCP 접근 방식:
- 경로 추측: 비행 전체 경로 $\mathbf{u}(\cdot)$ 에 대한 초기 추측값을 생성합니다. (e.g., 현재 PN 시뮬레이션 결과에 사용)
- 선형화 및 볼록화: 추측된 경로 주변에서 비선형 동역학을 선형화하고, 비볼록 제약 조건들을 볼록하게 근사합니다.
이렇게 되면 문제는 우리가 쉽게 풀 수 있는 볼록 최적화 문제 (e.g., Quadratic Progam, QP)로 변환됩니다.
선형화 유도
1. 기본 아이디어: 함수의 접선 근사
복잡한 비선형 함수 $f(x)$가 있다고 생각해봅시다. 우리는 이 함수 전체를 다루기 어렵지만, 특정 지점 $x_0$ 근처에서 이 함수를 $x_0$에서의 접선으로 유사하게 근사 가능합니다.
이 접선의 방적식이 1차 테일러 급수입니다.
\[f(x) \approx f(x_0) + f'(x_0)(x - x_0)\]이 식은 복잡한 곡선 $f(x)$를 선형 함수로 바꿔줍니다.
2. 시스템 동역학으로 확장: 자코비안 행렬
이 아이디어를 다변수 비선형 동역학 함수 $\dot{\mathbf{x} = f(\mathbf{x}, \mathbf{u})}$에 적용해봅시다.
여기서 미분, 즉 기울기는 편미분을 모아놓은 자코비안 행렬(Jacobian Matrix)가 대신합니다.
우리는 미리 추측한 기준 경로(Nominal Trajectory) 인 ($\mathbf{x}_0(t), \mathbf{u}_0(t)$) 주변에서 테일러 급수 전개를 수행합니다.
\[f(\mathbf{x}, \mathbf{u}) \approx f(\mathbf{x}_0, \mathbf{u}_0) + \frac{\partial f}{\partial \mathbf{x}}\biggr|_{(\mathbf{x}_0, \mathbf{u}_0)} (\mathbf{x} - \mathbf{x}_0) + \frac{\partial f}{\partial \mathbf{u}}\biggr|_{(\mathbf{x}_0, \mathbf{u}_0)} (\mathbf{u} - \mathbf{u}_0)\]각 항을 정의합니다.
\[A(t) = \frac{\partial f}{\partial \mathbf{x}} \biggr|_{(\mathbf{x}_0(t), \mathbf{u}_0(t))}\] \[B(t) = \frac{\partial f}{\partial \mathbf{u}}\biggr|_{(\mathbf{x}_0(t), \mathbf{u}_0(t))}\]이 행렬들을 위 테일러 급수 식에 대입하고, 기준 경로로부터의 편자(deviation) 를 $\delta \mathbf{x} = \mathbf{x} - \mathbf{x}_0$과 $\delta \mathbf{u} = \mathbf{u} - \mathbf{u}_0$로 정의 후 식을 정리하면, 다음과 같은 선형화된 편자 동역학(Linearized Deviation Dynamics) 를 얻게 됩니다.
\[\delta\dot{\mathbf{x}}(t) \approx A(t)\delta\mathbf{x}(t) + B(t)\delta\mathbf(u)(t)\] \[\begin{align*} \dot{\mathbf{x}} & \approx f(\mathbf{x}_0, \mathbf{u}_0) + A(t)(\mathbf{x} - \mathbf{x}_0) + B(t)(\mathbf{u} - \mathbf{u}_0) \\ \delta\dot{\mathbf{x}} + \dot{\mathbf{x}}_0 & \approx \dot{\mathbf{x}}_0 + A(t)\delta\mathbf{x} + B(t)\delta\mathbf{u} \\ \dot{\delta\mathbf{x}}(t) & \approx A(t)\delta\mathbf{x}(t) + B(t)\delta\mathbf{u}(t) \end{align*}\]3. 최적화 문제로의 전환
이산화(Discretization): 위 선형 미분방정식을 이산화하면 $\delta\mathbf{x}_{k+1} = A_k \delta\mathbf{x}_k + B_k \delta\mathbf{u}_k$ 와 같은 선형 대수 관계로 변환됩니다.
QP로의 변환: 우리의 목적 함수는 $\sum\lVert\mathbf{u}_k\rVert^2$ 이므로 이차 함수(Quadratic) 입니다.
제약 조건은 이제 선형(Linear) 입니다. 따라서 원래의 비볼록 문제가 QP(Quadratic Program)라는 매우 잘 알려진 형태의 볼록 최적화 문제로 바뀌게 됩니다.
5. 코드
위 수식을 코드로 변환하면 다음과 같습니다.
import numpy as np
import matplotlib
import matplotlib.pyplot as plt
from matplotlib.patches import Wedge, Rectangle
from matplotlib.animation import FuncAnimation
from IPython.display import HTML, display
import matplotlib.transforms as transforms
# 노트북 환경에서 포함되는 애니메이션의 용량 제한을 늘립니다.
matplotlib.rcParams['animation.embed_limit'] = 50.0
# --- 1. 시뮬레이션 환경 및 파라미터 정의 ---
# 초기 조건
my_position = np.array([0, 0]) # 미사일 발사대의 시작 위치
initial_target_position = np.array([100, 200]) # 목표물의 초기 위치
target_velocity = np.array([50.0, -30.0]) # 목표물의 등속도 벡터
# 센서/무장 파라미터
radius = 130 # 센서 또는 교전 구역의 시각적 반경
theta_start_deg = -30 # 시각적 섹터의 시작 각도
theta_end_deg = 60 # 시각적 섹터의 끝 각도
# 미사일 속성
missile_sigma = 40.0 # 폭발의 가우시안 히트맵을 위한 표준 편차 (폭발 반경)
missile_width = 2 # 미사일의 시각적 너비
missile_height = 7 # 미사일의 시각적 높이
initial_angle_deg = 20.0 # 미사일의 초기 발사 각도
initial_speed = 50.0 # 미사일의 초기 속도
thrust_force = 80.0 # 엔진이 켜졌을 때의 일정한 추력
drag_coefficient = 0.005 # 단순화된 항력 계수
fuel = 100.0 # 초기 연료량
fuel_consumption_rate = 0.2 # 추력 단위당 연료 소모율
mass = 1.0 # 미사일의 질량
max_turn_rate_dps = 90.0 # 초당 최대 선회율 (도)
# 시뮬레이션 제어
max_frames = 100 # 시뮬레이션의 최대 스텝 수
explosion_frames = 50 # 폭발 애니메이션이 지속될 프레임 수
dt = 0.1 # 시뮬레이션 시간 간격 (초)
# --- [수정된 부분] 플롯 범위 변수 ---
# 여기를 수정하여 모든 그래프의 X, Y축 범위를 조절할 수 있습니다.
plot_x_lim = (-50, 400)
plot_y_lim = (-50, 400)
# -----------------------------------
# --- 2. 동역학 시뮬레이션 실행 및 데이터 저장 ---
# 나중에 플로팅하기 위해 변수 기록을 저장할 리스트들
path_history, target_path_history, angle_history, velocity_history, fuel_history, thrust_history, drag_history = [], [], [], [], [], [], []
# 미사일 상태 변수 초기화
missile_pos = np.copy(my_position).astype(float)
missile_angle_rad = np.deg2rad(initial_angle_deg)
missile_vel = np.array([initial_speed * np.cos(missile_angle_rad), initial_speed * np.sin(missile_angle_rad)])
target_pos = np.copy(initial_target_position).astype(float)
current_fuel = fuel
# 메인 시뮬레이션 루프
for frame in range(max_frames):
# 목표물의 등속도에 기반하여 위치 업데이트
target_pos += target_velocity * dt
# 미사일에서 목표물까지의 벡터 계산 (시선 벡터)
vec_to_target = target_pos - missile_pos
# 미사일이 목표물에 충분히 가까워지면 비행 단계 종료
if np.linalg.norm(vec_to_target) < 10:
break
# --- 유도 법칙 (비례 항법) ---
# 목표물을 직접 향하기 위해 필요한 각도 계산
target_angle_rad = np.arctan2(vec_to_target[1], vec_to_target[0])
# 미사일의 현재 각도와 목표 각도 사이의 오차 계산
angle_error = target_angle_rad - missile_angle_rad
# 최단 거리 회전을 위해 각도 오차를 [-pi, pi] 범위로 정규화
angle_error = (angle_error + np.pi) % (2 * np.pi) - np.pi
# 현재 시간 간격(dt) 동안 미사일이 선회할 수 있는 최대 각도 계산
turn_rate_rad = np.deg2rad(max_turn_rate_dps)
# 선회량을 미사일의 물리적 최대 선회율로 제한
turn_amount = np.clip(angle_error, -turn_rate_rad * dt, turn_rate_rad * dt)
# --- 추진 및 연료 ---
current_thrust = 0
# 연료가 남아있을 경우에만 추력을 가하고 선회
if current_fuel > 0:
# 미사일의 각도 업데이트
missile_angle_rad += turn_amount
# 추력을 최대값으로 설정
current_thrust = thrust_force
# 추력과 시간에 기반하여 연료 소모
fuel_consumed = thrust_force * fuel_consumption_rate * dt
current_fuel = max(0, current_fuel - fuel_consumed)
# --- 동역학 (뉴턴의 제2법칙 & 오일러 적분) ---
# 미사일의 현재 각도에 기반한 추력 벡터 계산
thrust_vec = np.array([np.cos(missile_angle_rad), np.sin(missile_angle_rad)]) * current_thrust
# 항력 계산 (단순화된 모델: F_drag = -k * |v| * v)
current_speed = np.linalg.norm(missile_vel)
drag_vec = -drag_coefficient * current_speed * missile_vel
# 미사일에 작용하는 모든 힘을 합산
total_force = thrust_vec + drag_vec
# 뉴턴의 제2법칙(a = F/m)을 사용하여 가속도 계산
acceleration = total_force / mass
# 오일러 적분을 사용하여 속도 및 위치 업데이트
missile_vel += acceleration * dt
missile_pos += missile_vel * dt
# 현재 상태 변수들을 각각의 기록 리스트에 저장
path_history.append(np.copy(missile_pos)); target_path_history.append(np.copy(target_pos)); angle_history.append(missile_angle_rad)
velocity_history.append(np.copy(missile_vel)); fuel_history.append(current_fuel); thrust_history.append(current_thrust)
drag_history.append(np.linalg.norm(drag_vec))
# --- 플로팅을 위한 데이터 처리 ---
flight_frames = len(path_history) # 비행이 지속된 총 프레임 수
path_arr = np.array(path_history); target_path_arr = np.array(target_path_history)
vel_arr = np.array(velocity_history)
vx_history = vel_arr[:, 0]; vy_history = vel_arr[:, 1]
t_path = np.arange(flight_frames) * dt # 플롯을 위한 시간 축 생성
# --- 3. 정적 분석 플롯 생성 ---
# 이 섹션은 시뮬레이션 완료 후 비행 데이터를 분석하기 위한 플롯을 생성합니다.
print("--- Generating Final Static Analysis Plot ---")
fig_analysis, axs = plt.subplots(2, 2, figsize=(12, 10), sharex=True)
fig_analysis.suptitle('Final Trajectory Analysis', fontsize=16)
axs = axs.flatten()
axs[0].plot(t_path, vx_history, 'b-'); axs[0].set_title('X Velocity vs. Time'); axs[0].set_ylabel('Vx (m/s)'); axs[0].grid(True)
axs[1].plot(t_path, vy_history, 'm-'); axs[1].set_title('Y Velocity vs. Time'); axs[1].set_ylabel('Vy (m/s)'); axs[1].grid(True)
axs[2].plot(t_path, fuel_history, 'g-'); axs[2].set_title('Remaining Fuel vs. Time'); axs[2].set_xlabel('Time (s)'); axs[2].set_ylabel('Fuel (%)'); axs[2].grid(True); axs[2].set_ylim(0, 105)
axs[3].plot(t_path, thrust_history, 'c-', label='Thrust'); axs[3].plot(t_path, drag_history, 'r-', label='Drag'); axs[3].set_title('Thrust & Drag vs. Time'); axs[3].set_xlabel('Time (s)'); axs[3].set_ylabel('Force'); axs[3].grid(True); axs[3].legend()
plt.tight_layout(rect=[0, 0, 1, 0.96]); plt.show()
# --- 4. 애니메이션 생성 ---
print("\n--- Generating Animation ---")
# 애니메이션을 위한 메인 Figure와 Axis 설정
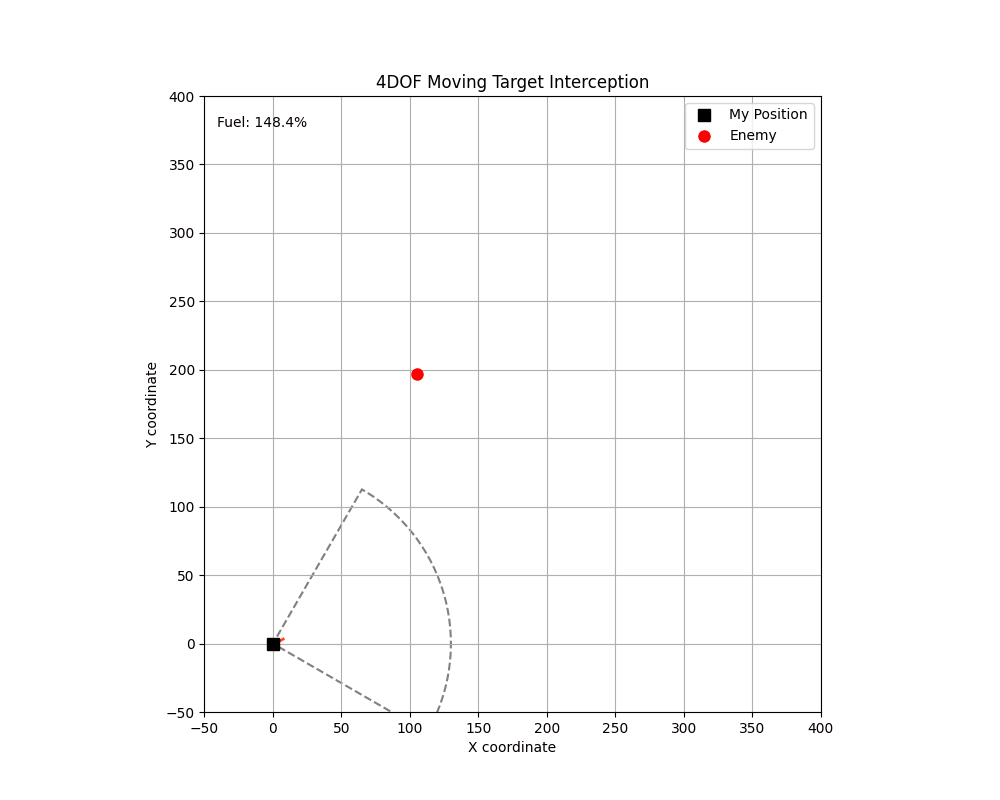
fig_anim, ax_anim = plt.subplots(figsize=(10, 8))
ax_anim.set_title("4DOF Moving Target Interception")
ax_anim.set_xlabel("X coordinate"); ax_anim.set_ylabel("Y coordinate")
ax_anim.grid(True); ax_anim.set_aspect('equal', adjustable='box')
# 미리 정의된 플롯 범위 사용
ax_anim.set_xlim(plot_x_lim); ax_anim.set_ylim(plot_y_lim)
# 폭발 히트맵을 위한 그리드 생성
grid_x, grid_y = np.meshgrid(np.linspace(plot_x_lim[0], plot_x_lim[1], 400), np.linspace(plot_y_lim[0], plot_y_lim[1], 400))
pos_grid = np.dstack((grid_x, grid_y))
# 폭발 중심을 위한 최종 충돌 지점 계산
final_impact_point = path_arr[-1] if flight_frames > 0 else my_position
# 폭발 확률 맵을 위한 2D 가우시안 분포 생성
hit_probability = np.exp(-np.sum((pos_grid - final_impact_point)**2, axis=-1) / (2 * missile_sigma**2))
# 히트맵 이미지 객체 생성, 초기에는 투명(alpha=0)
heatmap_anim = ax_anim.imshow(hit_probability, cmap='hot', extent=[*plot_x_lim, *plot_y_lim], origin='lower', alpha=0)
# 애니메이션을 위한 정적 및 동적 플롯 객체 생성
ax_anim.plot(my_position[0], my_position[1], 'ks', ms=8, label='My Position') # 발사대
sector_anim = Wedge(my_position, radius, theta_start_deg, theta_end_deg, facecolor='none', edgecolor='gray', lw=1.5, ls='--'); ax_anim.add_patch(sector_anim) # 센서 영역
missile_patch = Rectangle((-missile_height/2, -missile_width/2), missile_height, missile_width, facecolor='orangered'); ax_anim.add_patch(missile_patch) # 미사일 본체
trajectory_line, = ax_anim.plot([], [], '--', color='orange', linewidth=2) # 미사일 경로
target_plot, = ax_anim.plot([], [], 'ro', ms=8, label='Enemy') # 목표물 마커
fuel_text = ax_anim.text(0.02, 0.95, '', transform=ax_anim.transAxes) # 연료 상태 텍스트
ax_anim.legend(loc='upper right')
# 애니메이션을 위한 메인 업데이트 함수, 각 프레임마다 호출됨
def update(frame):
# --- 비행 단계 ---
if frame < flight_frames:
# 현재 프레임에 대한 데이터 가져오기
missile_pos = path_history[frame]
missile_angle_rad_current = angle_history[frame]
target_pos_current = target_path_history[frame]
# 미사일 패치를 회전하고 이동시키기 위한 변환 생성
transform = (transforms.Affine2D().rotate(missile_angle_rad_current) +
transforms.Affine2D().translate(missile_pos[0], missile_pos[1]) +
ax_anim.transData)
missile_patch.set_transform(transform)
# 궤적 선과 목표물 위치 업데이트
trajectory_line.set_data(path_arr[:frame+1, 0], path_arr[:frame+1, 1])
target_plot.set_data([target_pos_current[0]], [target_pos_current[1]])
# 연료 텍스트 업데이트
fuel_text.set_text(f'Fuel: {fuel_history[frame]:.1f}%')
# --- 폭발 단계 ---
else:
# 충돌 후 미사일과 목표물을 보이지 않게 처리
missile_patch.set_visible(False)
target_plot.set_visible(False)
# 폭발 애니메이션 진행률 계산 (0.0에서 1.0까지)
explosion_progress = min(1.0, (frame - flight_frames) / explosion_frames) if (frame - flight_frames) >= 0 else 0
# 폭발 히트맵을 서서히 나타나게 함
heatmap_anim.set_alpha(explosion_progress)
return missile_patch, trajectory_line, target_plot, fuel_text, heatmap_anim
# 애니메이션 객체 생성
anim = FuncAnimation(fig_anim, update, frames=flight_frames + explosion_frames, interval=30, blit=True)
# 정적 플롯이 노트북에 표시되는 것을 방지하기 위해 닫음
plt.close(fig_anim)
# 애니메이션 저장 (선택 사항)
# anim.save("missile_simulation.gif", writer='imagemagick')
# 노트북 환경에서 애니메이션 표시
display(HTML(anim.to_jshtml()))